Manage my account
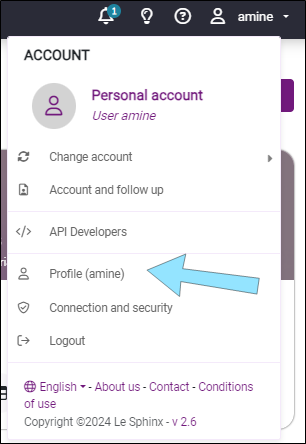
You can view and modify all the information relating to your account (surname, first name, company name, VAT number, address, telephone number and language, etc.) from the account management interface. To access it:
-
Click on the icon
 at the top right of the page.
-
Click on Profile.
 CHANGE ACCOUNT EMAIL ADDRESS
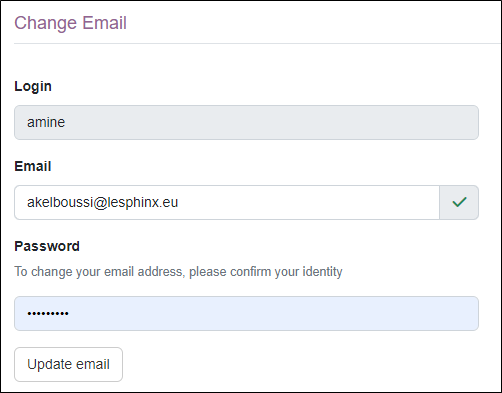
To change your e-mail address, proceed as follows:
-
Click on the Email Address tab.
-
Enter the new address in the Email field.
-
Confirm your identity by entering your account password.
-
Click Update e-mail to confirm the change.
CHANGE PASSWORD
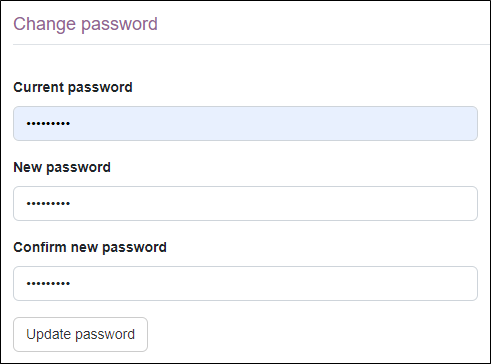
To change the password, proceed as follows:
-
Click on the Password tab.
-
Enter your current password.
-
Enter the new password.
-
Confirm the new password by entering it again.
-
Click on the Update password button.
NOTE: The password must contain at least 8 characters and meet the following criteria:
- at least 5 different characters
- at least one lowercase letter
- at least one digit
- at least one non alphanumeric character
MODIFY PROFILE
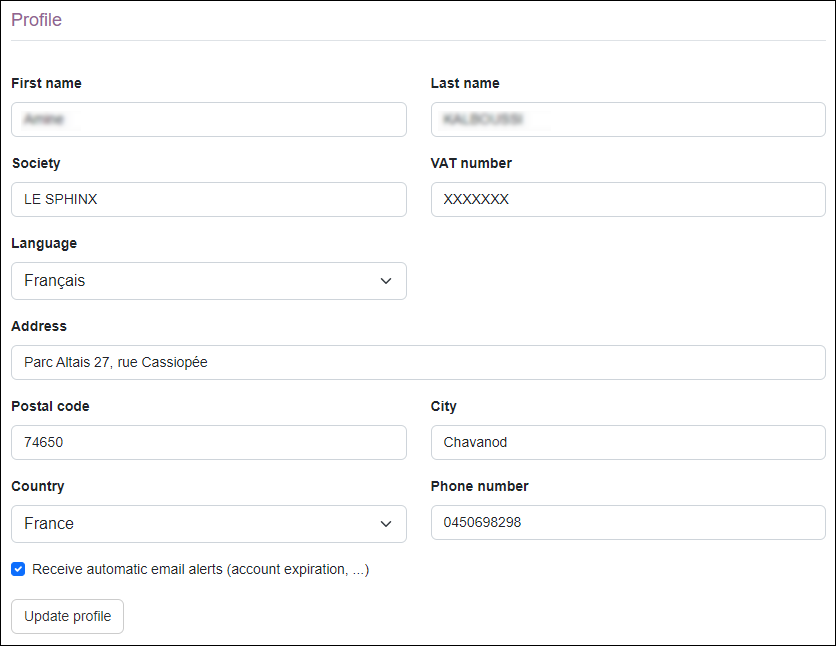
To modify the profile, proceed as follows:
-
Click on the Profile tab.
-
Make the necessary changes.
-
(Optional) If you no longer wish to receive automatic alerts (expiry of your account, next update of the solution, etc.), untick the box Receive automatic email alerts.
-
Click Update profile to apply the changes.
TWO-FACTOR AUTHENTICATION
Two-factor verification helps protect you by making it more difficult for others to log into your account. It uses two different forms of identity: your password and a contact method (or security information). Even if someone finds out your password, they can't go any further if they don't have access to your security information. This is also why it is important to use different passwords for your accounts.
To enable two-step verification:
-
Click on the icon
at the top right of the page. -
Click on Connection & security.
-
Click on the Two-factor authentication tab.
-
Select the validation method to be used:
 SET UP A SECURITY KEY
A security key is a physical device (such as a USB security key) that you can use to log into your account in 2FA mode.
To add a security key, do the following:
-
Enter the name of the device.
-
Click the Register a security key button.
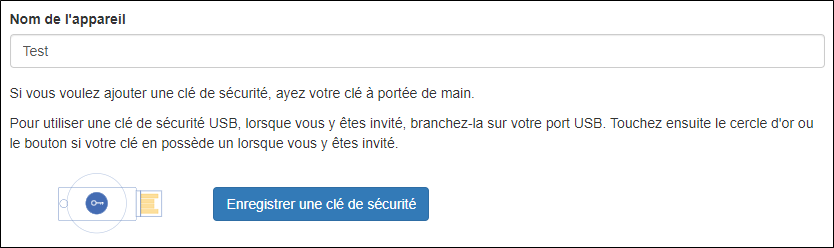
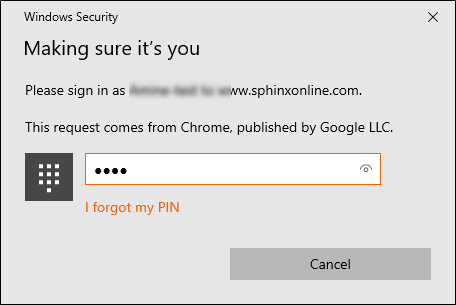
NOTE: You can also use Windows Hello as an authentication method if it is already set up on your computer, by clicking on the Register a security key button, the tool will ask you to verify your identity using the set up login method.
-
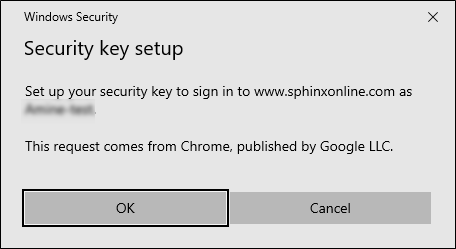
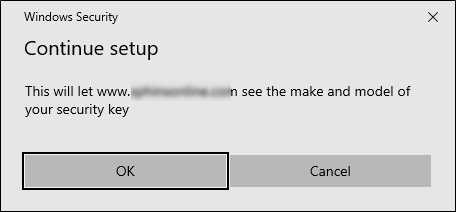
Two new windows will open, click on OK.
-
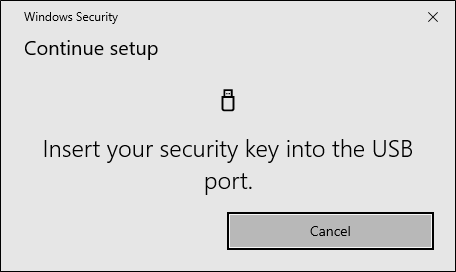
Plug your dongle into your USB port.
-
Touch the golden circle or button if your key has one when prompted.
Congratulations, your login is now protected by a security key.
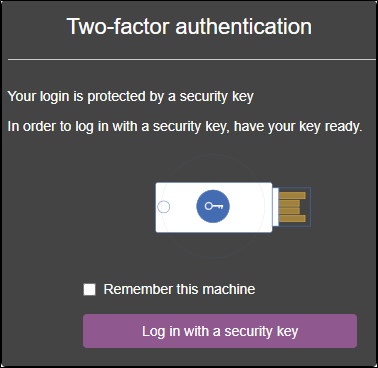
The next time you log in to the SphinxOnline account, you will be prompted to perform a second validation step after entering your password.
ADD AN AUTHENTICATOR APPLICATION
-
Click on the Add authenticator app.
-
Download a two-factor authentication application on your smart-phone (example: Microsoft authenticator).
-
Then scan the QR code or enter the key that is displayed in step 2 (see screen-shot below).
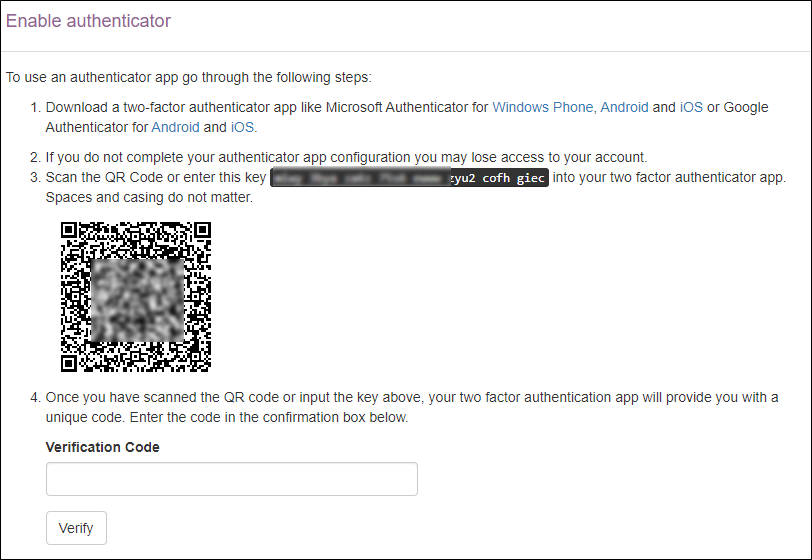
NOTE: Spaces and casing do not matter.
-
Enter the code that will be provided by the two-factor authentication application in the "Verification Code" box.
-
Click on Verify.
Congratulations, your password and a verification code (available in the two-factor authentication application) will now be required when your login is used to log in.
-
NOTE: You can disable two-step verification at any time by clicking the Disable button.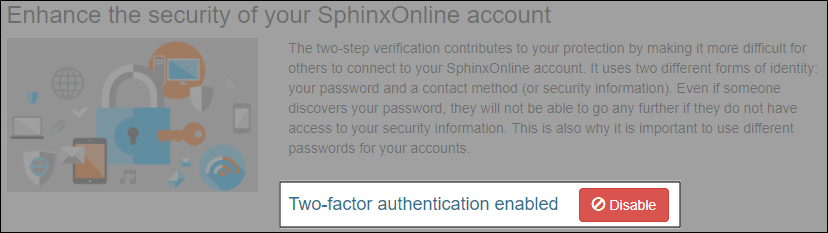
This action will not remove any security keys / authentication applications you have already set up.
Recovery codes
As soon as a validation step is implemented, 10 recovery codes will be automatically generated, these codes allow you to access your account if you no longer have access to your authentication device.
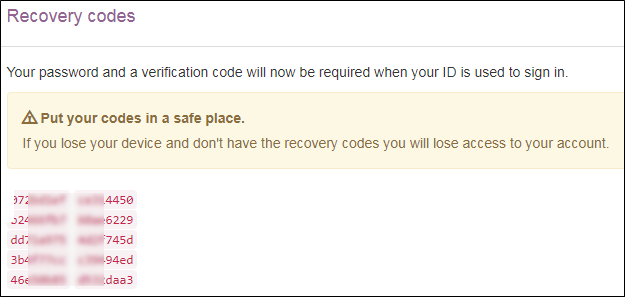
NOTE: Put your codes in a safe place.
If you lose your device and don't have the recovery codes you will lose access to your account !
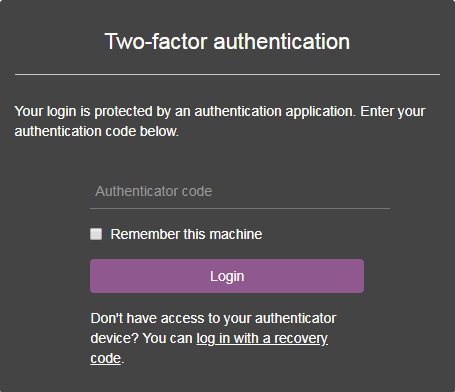
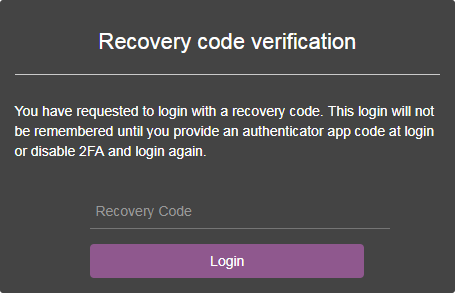
If you do not have access to your authentication device, click on the "log in with recovery code" link.
API PERSONAL ACCESS TOKENS
Access tokens are used to access the Sphinx API instead of your login/password.
To generate a token, proceed as follows:
-
Click on the API personal access tokens tab.
-
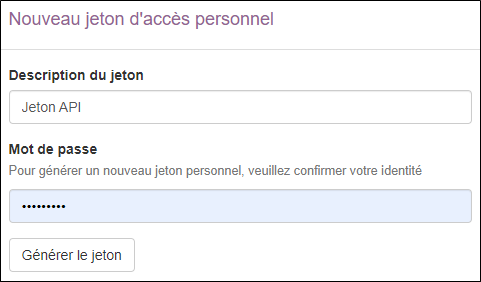
Click on Generate new token.
-
Fill in the description of the token and confirm your identity by entering the account password.
-
Click on the Generate token button.
-
Copy the generated token to use it by clicking on the
 button.
NOTE: Be sure to copy your new personal access token as soon as it is generated because you will not see it again if you exit the page.
You can revoke or delete the generated token at any time.

-
In case of suspension, applications or scripts using this token will no longer be able to access the Sphinx API. You can reactivate this token later.
-
In case of deletion, applications or scripts using this token will no longer be able to access the Sphinx API. You cannot undo this action.
DOWNLOAD PERSONAL DATA
Your account contains personal data that you have provided to us. You can download it at any time, to do so:
-
Click on the Personal Data tab.
-
Click on the Download button.
A .json file will be downloaded.
ADD A SENDING DOMAIN
You can now add your own domain name to optimize the success of your email campaigns.
NOTE: We invite you to contact your IT department to set up a sending domain.
To add a sending domain, proceed as follows:
-
Click on the icon
at the top right of the page. -
Click on Account and follow-up.
-
Click on the Sending domains tab in the side menu.
-
Click on the Add a domain button.
-
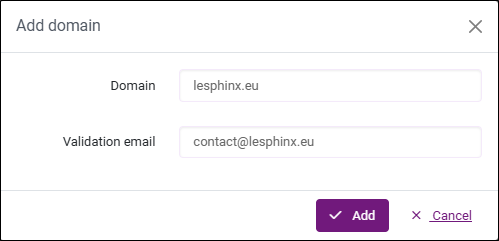
Fill in a valid domain and a validation email address.
-
Click on the Add button.
-
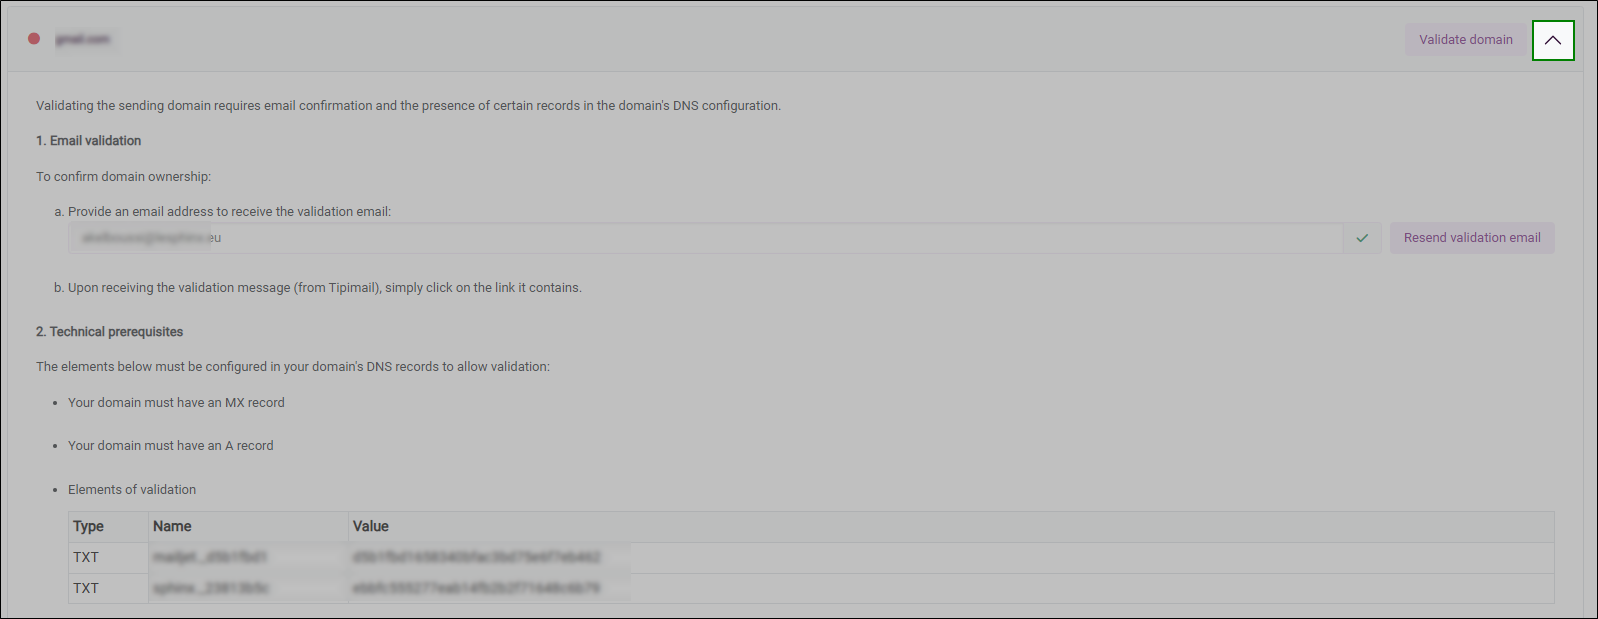
Click on the small arrow to access the validation elements.
-
Communicate the validation elements to your IT department to do the necessary.
<!> The DNS configuration of the domain must be done for the validation of the domain to work. <!>
A Copy elements to clipboard button is available at the bottom of the page to automatically copy the validation elements.
-
Click on the validation link received by email.
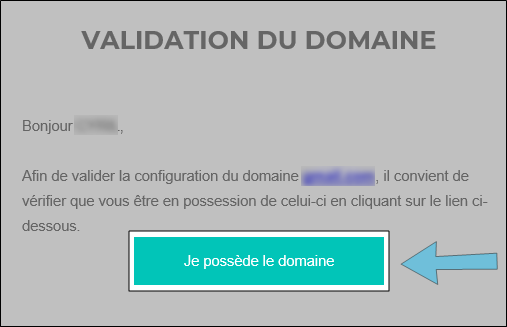
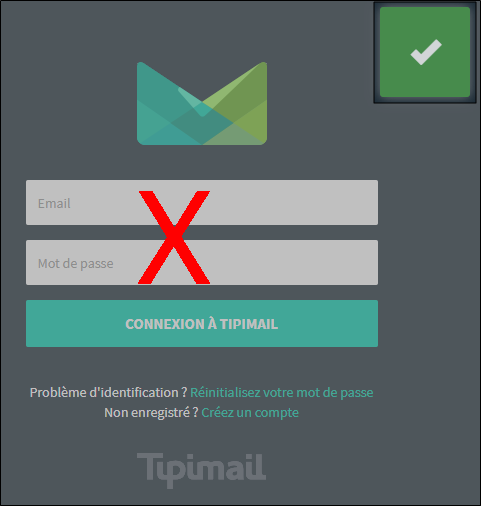
A new web page will open to confirm the validation.
NOTE: The connection request to TIPIMAIL is be ignored.
If you need to resend the validation email to another email address, just enter it instead of the old one and click on the Resend validation email button.
-
Then click on Validate domain.
NOTE: You can also add a sending domain to a collaborative account from the same environment.
NOTE: If you encounter any difficulty, please send us a request to hotline@lesphinx.eu.
Add a sending address
Once your domain is validated, you can proceed to add a new sending address:
-
Click on the + button on the right of the Email sender field.
Fill in the new sending address.
-
Click on Add.
NOTE: The new address will be available for use when you click on the activation link in the email. Once the address has been activated, you will have to log out and then log back in so that it appears in the selection list.
TRACK CREDIT USAGE
To view your credit usage:
-
Click on the icon
at the top right of the page. -
Click on Account and follow up.
-
Click on the Activity tab in the side menu.
You will be taken to the credit usage tracking page, where you can:
-
View an overall summary of your activity (surveys, dashboards, reports).
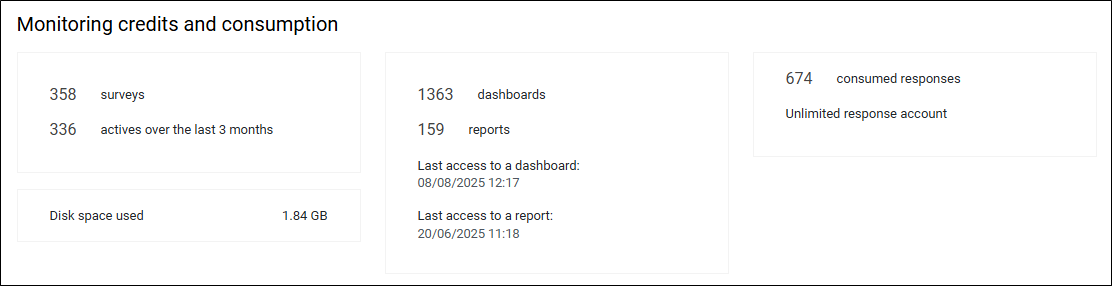
-
See your credit usage (responses, emails, SMS) compared to the remaining credits.
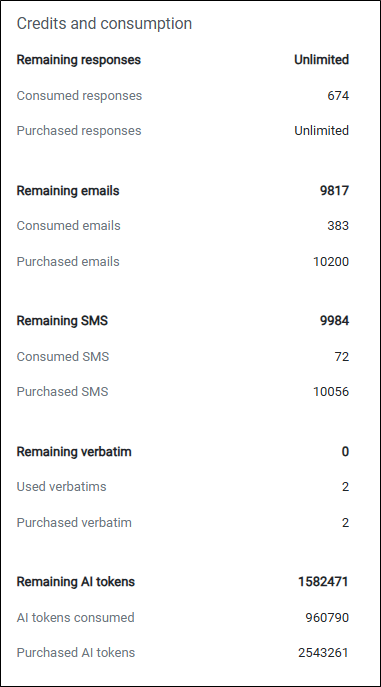
-
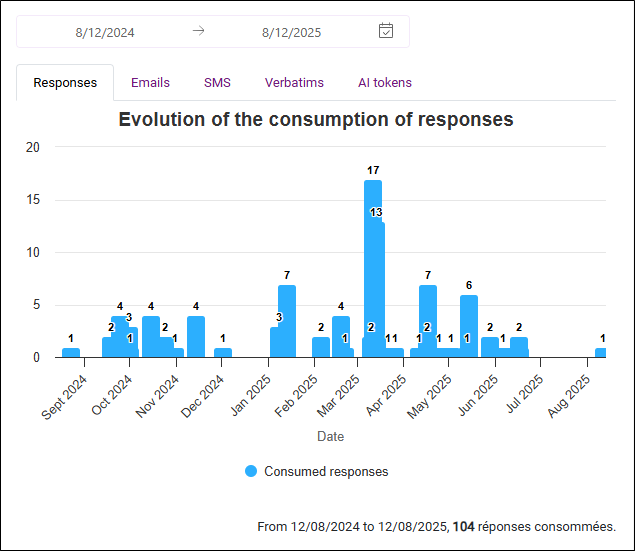
Visualize the evolution of this usage on a graph, which you can filter by date range and by credit type.