Write the email message
After creating your distribution channel, you can write the associated email message.
The invitation message should capture the recipients’ interest and encourage them to take part in the survey. Be sure to include clear information about the survey topic, its duration, and the participation link. To maximize the impact of your mailings, we recommend following email best practices (relevant subject line, appropriate tone, personalization, etc.).
If needed, you can also prepare a reminder message to encourage recipients who have not yet responded to take part in the survey.
NOTE: The reminder can be sent by email, SMS, RCS message, or WhatsApp message.
To write an email:
-
Go to the Messages section of the relevant distribution channel.
NOTE: By default, an invitation message and a reminder message are provided. You can edit and use them, or duplicate them if needed.
- Click the New Message button, then click Email.
-
Select a template from the Gallery or My templates tabs, or import your MJML/HTML code from the Import code tab.
-
Name your message, then click Apply.
The editor opens. Edit the content of your message.
The message-writing environment consists of 3 areas:
-
The left-hand pane, where you can select custom links, sections, or content to drag and drop into the message.
-
The workspace, where you can add the message subject, the sender's name and address, write your message, preview it on desktop, tablet, and mobile, and access other additional actions.
 Add a subject, a name, and a sender's email address
Enter the email subject, enter the sender's name, and select the sender's email address.
-
Email subject: Enter the email subject.
EXAMPLE: "We value your feedback" for a satisfaction survey.

-
Sender name: This field is optional; it stands for the text displayed in the FROM field of your email.
-
Email sender: Email address that will be used to send the email.
Add a sender email address
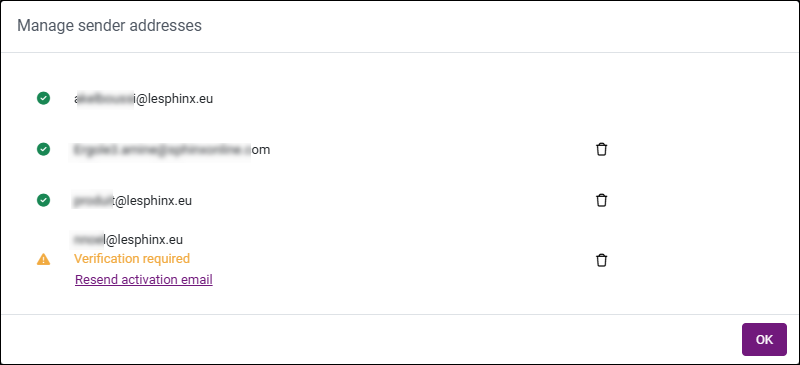
To add a new email address, you need to click on the + button and enter the email address.
A confirmation email is sent to this address. The address need to be confirmed before you can use it a the sender email address.
Click on the gear icon to manage sender email addresses - you can delete them or resend the confirmation email.
I
-
-
The right-hand pane, where you can modify the properties of the selected elements.
If you start from an empty message, first add columns where you can insert text, images, and other elements:
-
Drag and drop the 1, 2, or 3 Column(s) element from the Layout section of the left-hand pane.
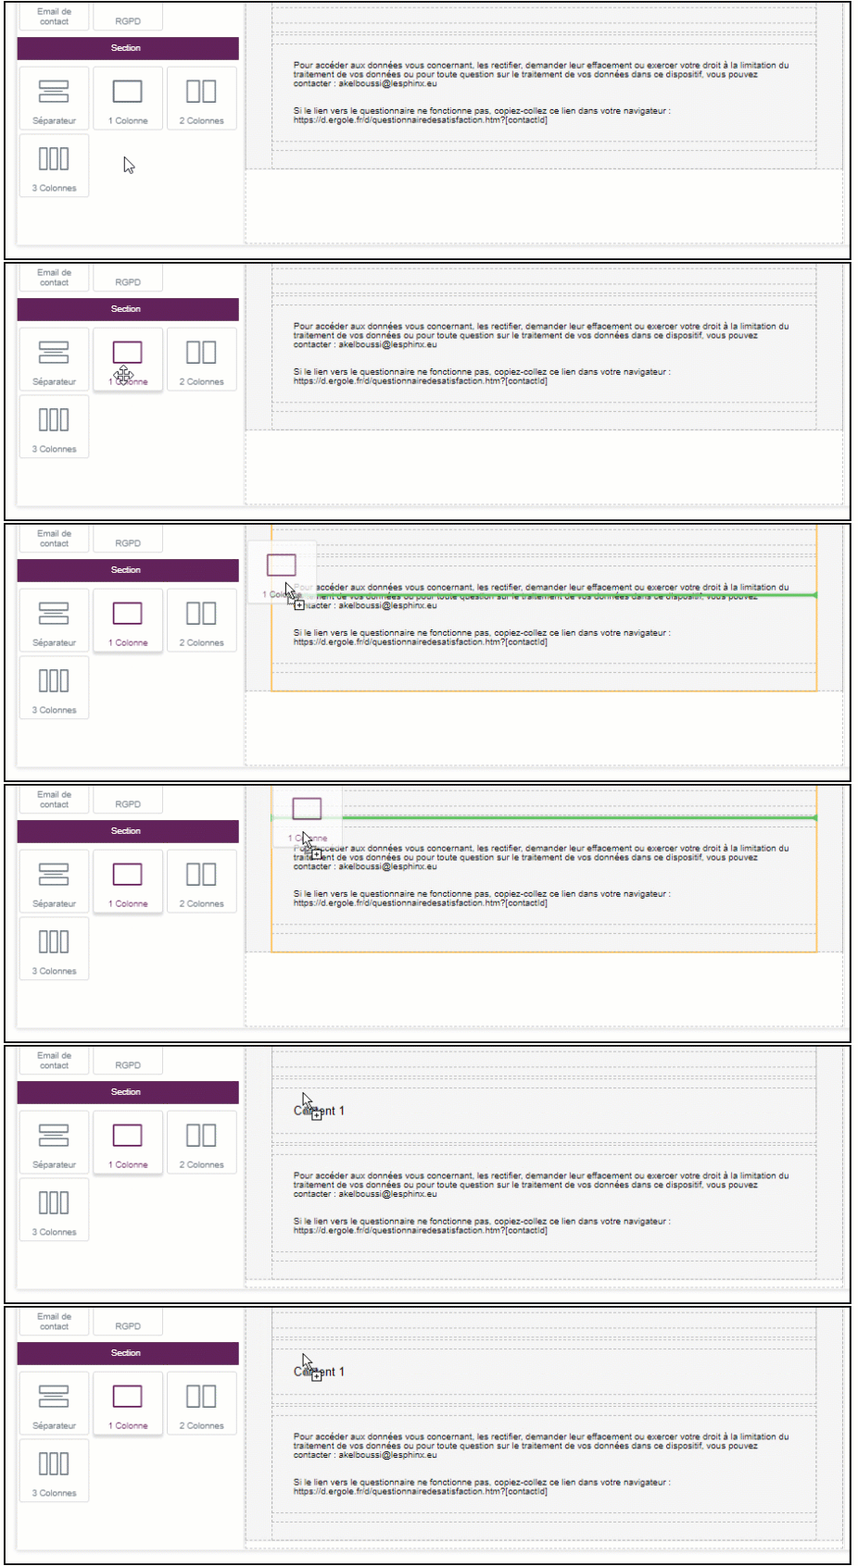
Click the image to view an animated preview
-
Insert the different elements you want to add to your message from the Custom links and Content sections into the corresponding columns.
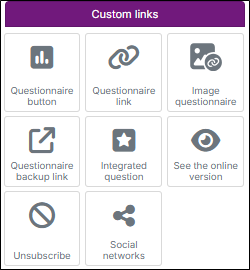
Custom links
-
Questionnaire button: adds a button that provides access to the questionnaire.
-
Questionnaire link: allows the user to open the questionnaire directly from a link.
-
Questionnaire image: adds a clickable image that provides access to the questionnaire.
-
Questionnaire back-up link: allows the user to access the questionnaire if they cannot use the main button or link.
-
Integrated question: inserts a question into the body of the message.
-
See the online version: provides access to the online version of the email if the user cannot display its content in their email application.
-
Unsubscribe: allows the user to unsubscribe from your mailings.
-
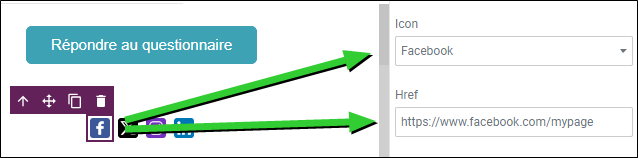
Social networks: inserts icons for the social networks of your choice by assigning the corresponding URL in the properties of each element.
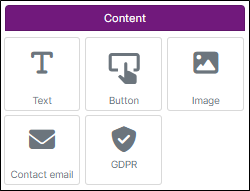
Content
-
Text: adds a text area.
NOTE: You can rephrase, improve clarity, correct grammar, or enhance your content using artificial intelligence. Learn more about text modification with AI.
-
Button: adds a button that provides access to a website. You can customize the button from the Element properties pane.
-
Image: inserts an image from your computer or from a URL.
-
Contact email: displays the text "Please reply to..." (the email address associated with the account is inserted by default). You can edit this text.
Add this text when you send an email from a noreply address.
-
GDPR: inserts a GDPR notice to inform and reassure users about the collection and use of their personal data.
Select an element to access its properties in the right-hand pane. You can modify:
-
The element alignment: left, right, centered, or justified.
-
The padding: adjusts the position of the element relative to its parent element.
EXAMPLE: The "No" button has 25 px of padding at the top and bottom, while the "Yes" button has no padding.
The position of each button is therefore different within the column.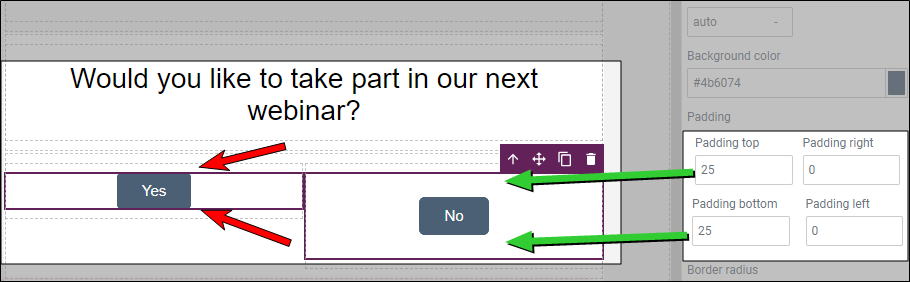
-
Formatting (font, font size, color, width, background color, border, etc.).
-
-
Click the Save button to save your changes.
A message verification window appears if one of the elements is not configured correctly. Learn more about message verification.
NOTE: To ensure the success of your emailing campaigns and optimize their performance, we recommend that you follow the best practices.
If needed, test your message.